
Go Green while celebrating luck and laughter in the Irish tradition
In time for St. Patrick’s Day celebrations or knitting lucky shamrocks anytime, February’s project in the Beyond BOBBOL 2014 KAL Series is Irish Coffee Cozy.
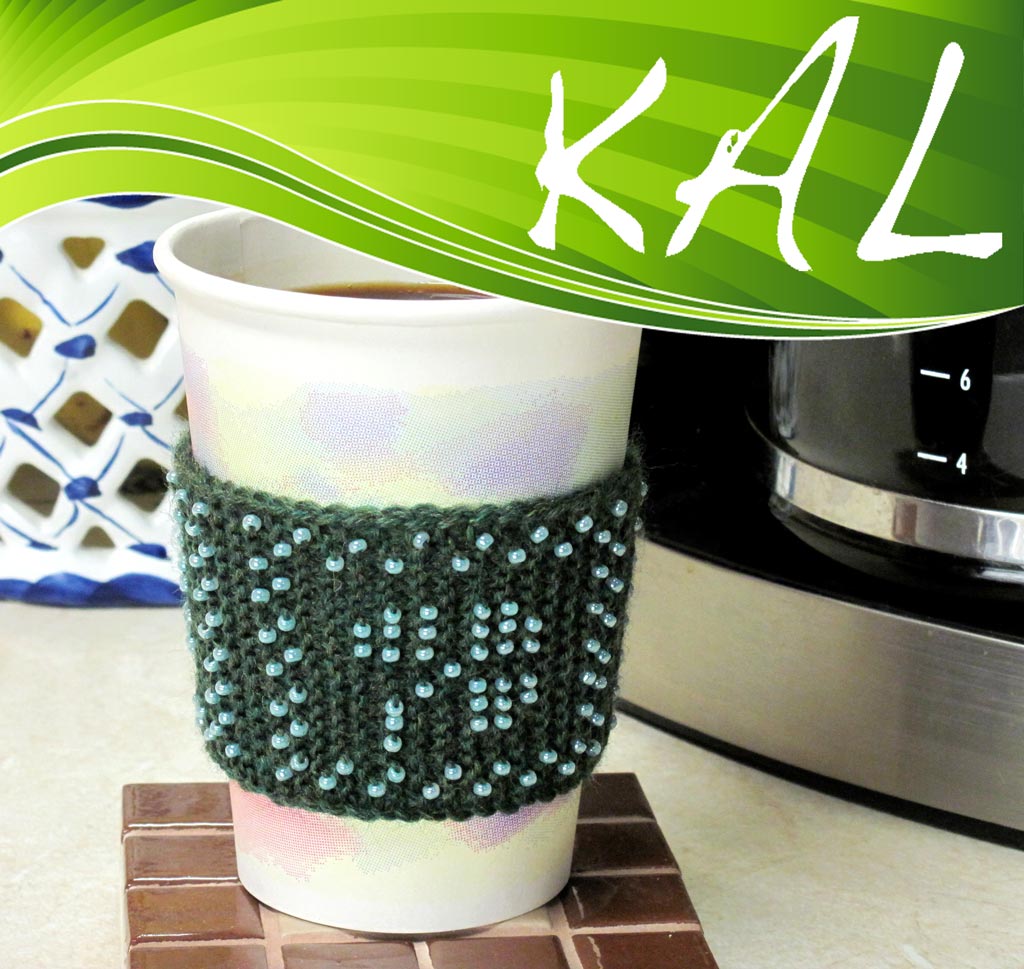
Forego cardboard sleeves at your local coffee shop and use this attractive cup huggie to turn plain coffee into a no-added-calorie, non-alcoholic way of making “Irish coffee”.
Need a gift idea? Knit some for co-workers and friends, even if they are not Irish.
Irish Coffee Cozy pattern is available now for free download or discount purchase according to your membership level. Be sure to go to the special Knit-A-Longs page HERE to see your best offer. These limited time offers run Feb 5 – 25, 2014.
Need Supplies?
Need yarn or beads? Supplies Paks are available for this KAL. If you already have yarn, bead colors in the size needed for this project are available for purchase here.
Starting Irish Coffee Cozy
Don’t be concerned if you have not knit with beads before, or you need a refresher. There are already lots of articles on the KnitHeartStrings with tips, photos, etc. to help you, and I will be making sure to point them out and review the major points as we knit along in the KAL.
For those already comfortable knitting with beads, you should have an easy time with these parts of the pattern. There will also be other techniques and tips I will cover though, so I hope you will still find the project enjoyable and worthwhile in your skills-building journey.
The basic techniques of knitting with beads are quite easy. In fact, there are MANY different methods of knitting with beads. However, they produce different design results and thus are not exactly interchangeable.
The method of knitting with beads that we are using for Irish Coffee Cozy starts with the beads strung onto your project yarn. Then while knitting, you push a bead between stitches as needed to produce the pattern design.
Review article: Beaded Garter Stitch: A fun and easy bit-sized start to knitting with beads
After you have gathered your supplies and gotten your pattern, the first step is to string beads onto your project yarn.
Review article: Stringing Beads without Special Equipment
Review article (if your beads came in a hank): Transferring Strings of Beads
This coffee cozy design takes 243 beads. For this particular project, it won’t hurt to have a few extra beads since the knitting is completed shorty after the beaded design is finished.
Tip for an easy way to “count” beads if exact count is not needed: Count the number of strung beads in an inch. Then calculate how many inches of strung beads you need. Round up to the next inch just to be sure you have enough. For size 8/0 Miyuki beads, typically there are between 12 and 12.5 beads per inch.
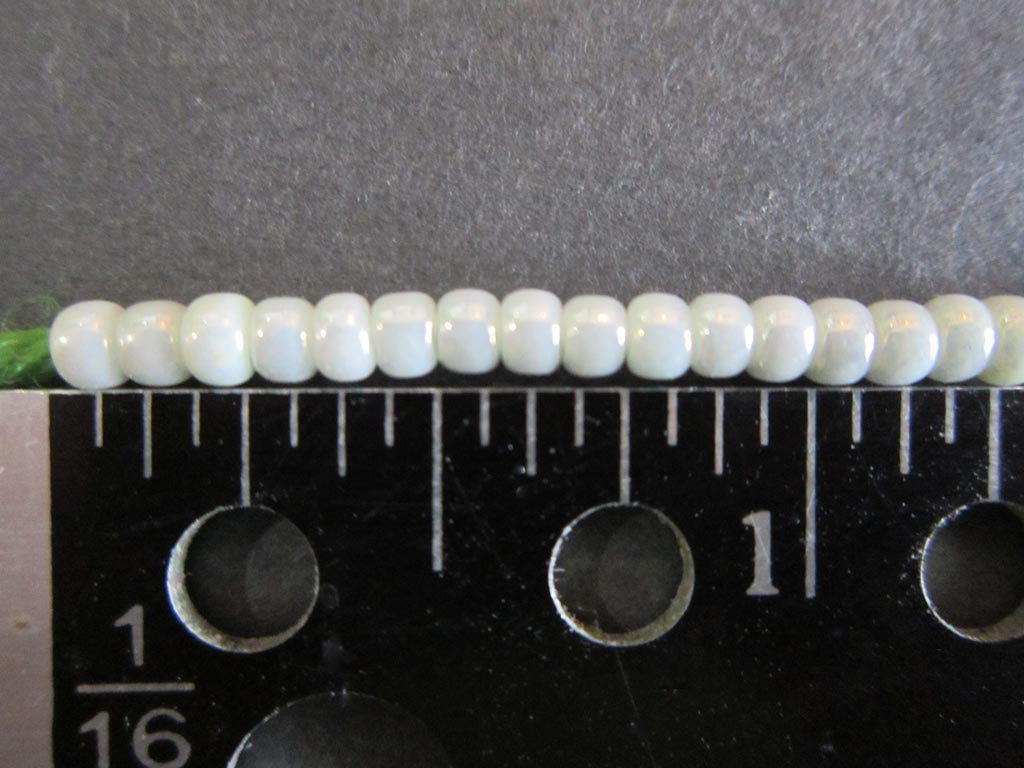
Count side-by-side beads strung on yarn to determine number of beads in an inch
Example calculation
12 beads per inch. 243 beads are needed.
243 beads divided by 12 beads per inch = 20.25 inches.
Round up to 21 inches for the length of beads to string.
Next up: Casting on
I’ll be back soon with the next article to discuss 2 different methods for casting on that are particularly well-suited to invisible seaming in garter stitch.

 HeartStrings FiberArts
 Knitting Bits of Lace on Facebook
 Ravelry Store