
Fast(er) Bead Stringing with a Bead Spinner
For projects that call for a large quantity of tiny seed beads, stringing loose beads can be quite time-consuming. If you are going to be doing a lot of projects that use large quantities of the same color bead or a random mix, you might want to consider getting or making a bead spinner for stringing the beads.
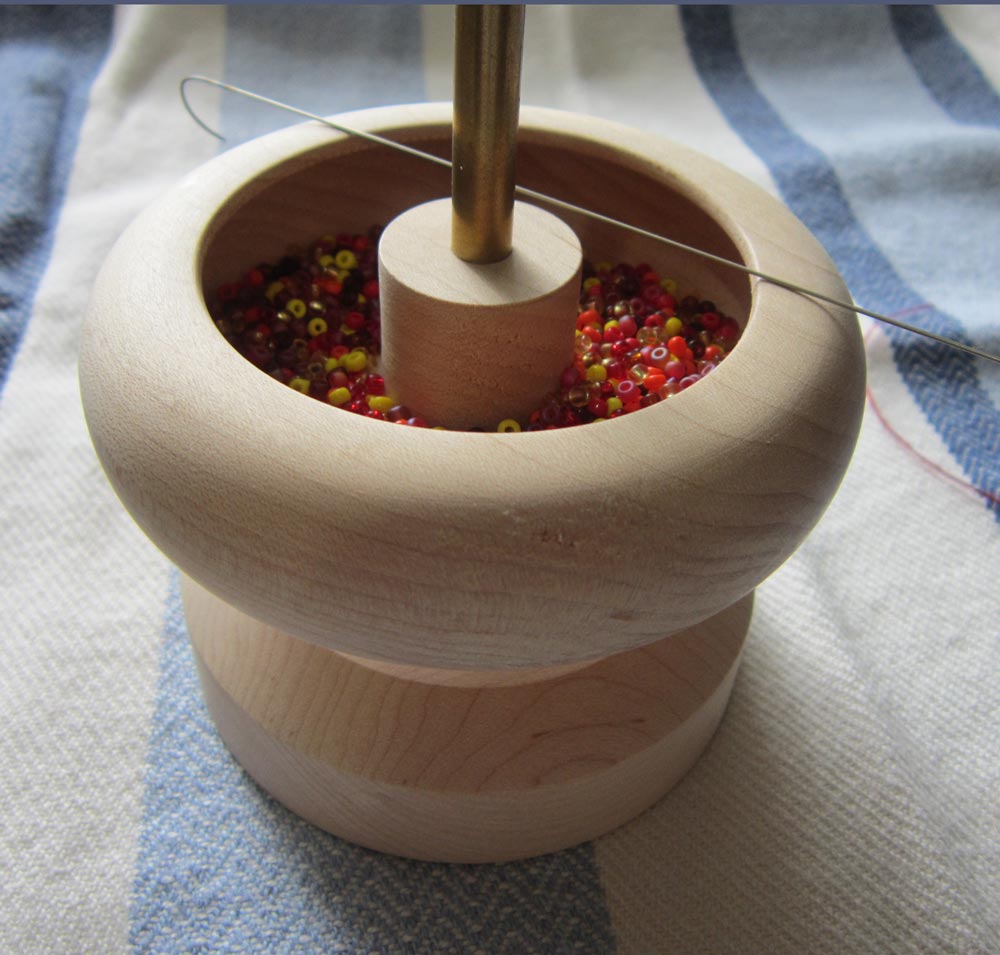
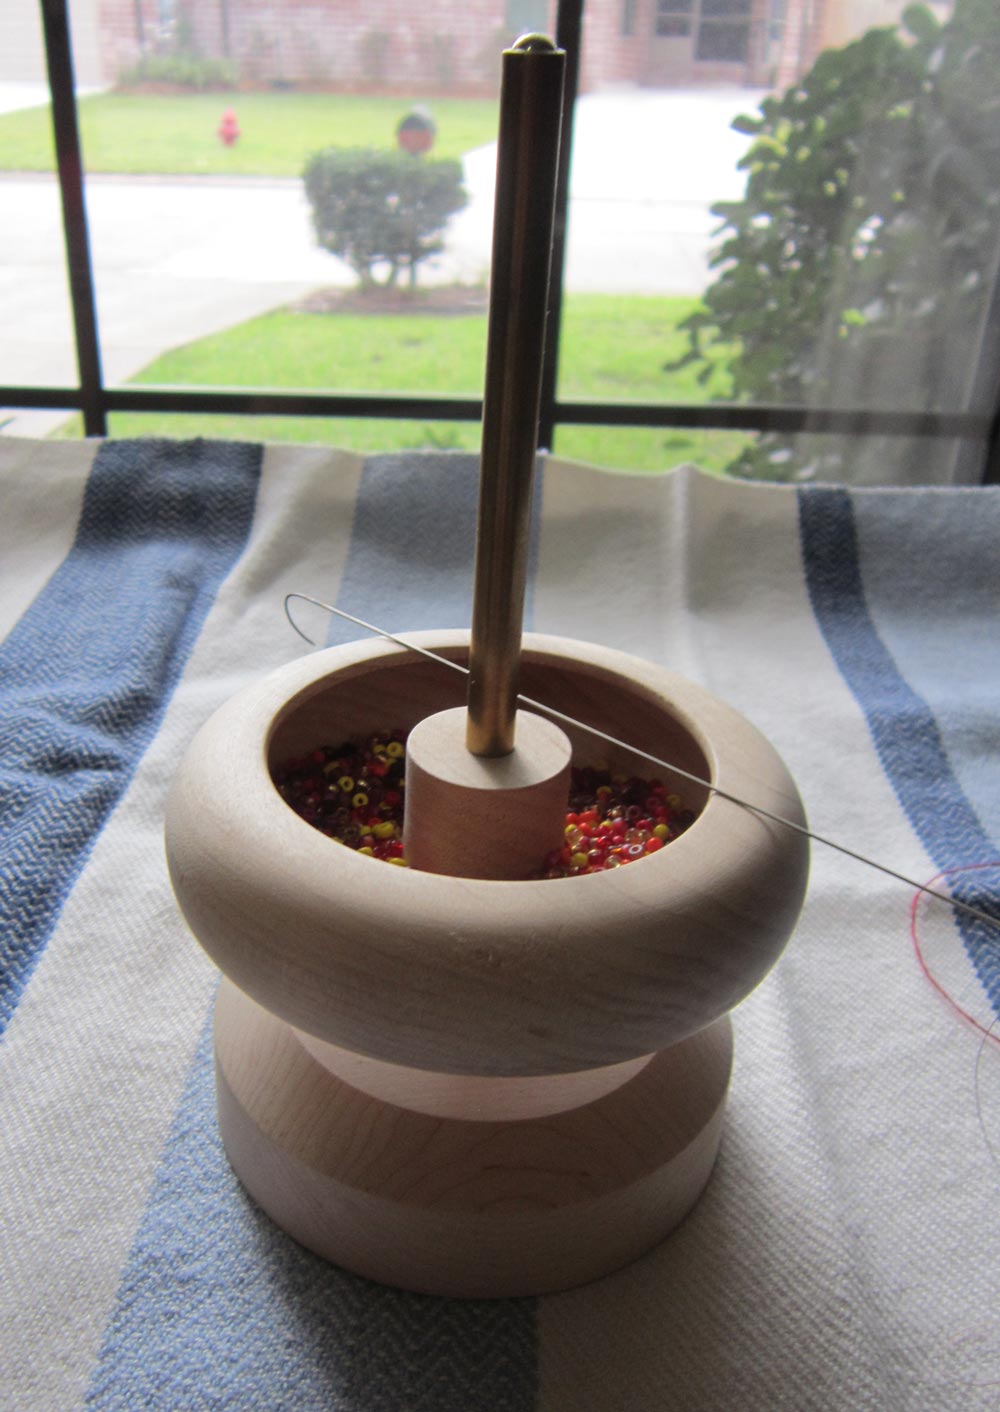 A bead spinner is a shallow bowl that rotates on a spindle. A thin wire needle, with a “j” curve at one end and threaded eye at the other end, is used to load the beads.
Overview of Using a Bead Spinner
Beads are placed in the bowl. Then the bowl is spun round and round while the curved end of the thin wire needle is dipped into the bowl to load the beads onto the needle. When several beads have been loaded, the needle is tilted upwards and the beads are pushed over the threaded end of the needle onto the yarn to be strung.
If you have not seen a bead spinner in action before, here is a link to a short YouTube video demonstrating the process.
Filling the Bead Spinner Bowl with Beads
Since the Bead Spinner works on the hit-or-miss principle, it is best to have more beads in the bowl than you will need. The more beads you have, the more likely the needle grabs beads rather than air.
However, you don’t want so many beads in the bowl that they fly out as you spin the bowl! The more beads you have, probably the slower you want to spin the bowl.
Holding the Thin Wire Needle
Getting used to holding the thin wire needle in a constant position at a good angle to catch the vortex of the beads might seem frustrating at first. As with most things, be patient and allow yourself to practice before thinking you can win the race on the first twirl.
Here is what works for me:
You are aiming to dip the end of the “j” curved end slightly below the surface of the beads as the bowl spins.
– If you are right-handed, hold the needle with the “j” end away from you and to the left of the spindle, then twirl with your left hand clockwise.
– If your are left-handed, hold the needle with the “j” end away from you and to the right of the spindle, then twirl with your right hand counter-clockwise.
Limitations to Using a Bead Spinner
– Single color or random mix of beads.
– Easy to overlook a defective bead that you will have to break later to remove. Tip: Use high quality beads to minimize this possible problem.
Types of Bead Spinners
Most commercially available bead spinners look similar. The main difference is whether then spindle can be seen (i.e. hand-twirled as in my Bead Spinner above) or not seen (i.e. battery-operated). Like most tools, how well the bead spinner actually functions for you can depend upon the quality. As the market has expanded over the last several years to a range of manufacturers, I fear that some of the entrants in the lightweight cheap plastic models might be a waste of money. I could be wrong, so if you have one of these and like it, let us know your experience.
Of course, you could try making your own. I came across this as one of the most minimalist DIY’s I have seen, although I am not sure how well it would actually work. Maybe worth a try?

 HeartStrings FiberArts
 Knitting Bits of Lace on Facebook
 Ravelry Store