Some Comments about the Self-reinforced Thumb Slot

How are you doing with this month’s KAL for Easy Elegant Mitts? If you’ve gotten past the purl bands with the beaded accent yarn, the going from there is pretty straight forward.

I do want to mention the technique used for the thumb opening. It is somewhat unique in being a self-reinforced thumb slot that is similar to a one-row horizontal buttonhole. With proper tension, you will have neatness with no gap between stitches at either end of the slot/buttonhole.  The instructions are detailed step-by-step in the Easy Elegant Mitts pattern.

Self-Reinforced One Row Buttonhole Thumb Slot

Self-Reinforced One Row Buttonhole Thumb Slot

Don’t try to memorize or understand this technique just by reading it through in the pattern — Get your yarn and needles in hand (or a sample swatch for practice), and follow along in the instructions. I myself use this technique seldom enough that even I have to refer to my instructions to be sure I have everything done in the correct order!

Tip: You can adapt this technique to other projects where you want a horizontal buttonhole. Just adjust the number of no-knit bind off stitches to be the width you want. The number of cast on stitches will always be one more than the number of bound off stitches.


Posted in Tips & Techniques | 3 Comments

Tips for making the most of beaded accent yarn

 knitting with beaded accent yarn to make the most
of showing every bead to fullest effect

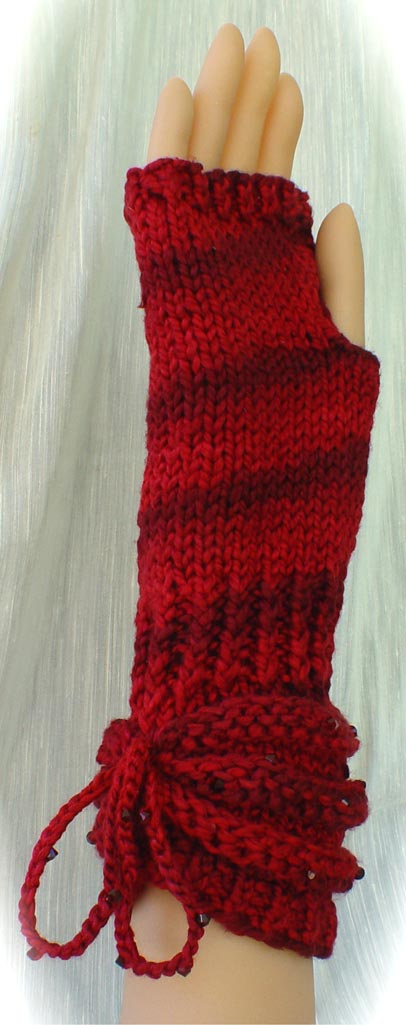
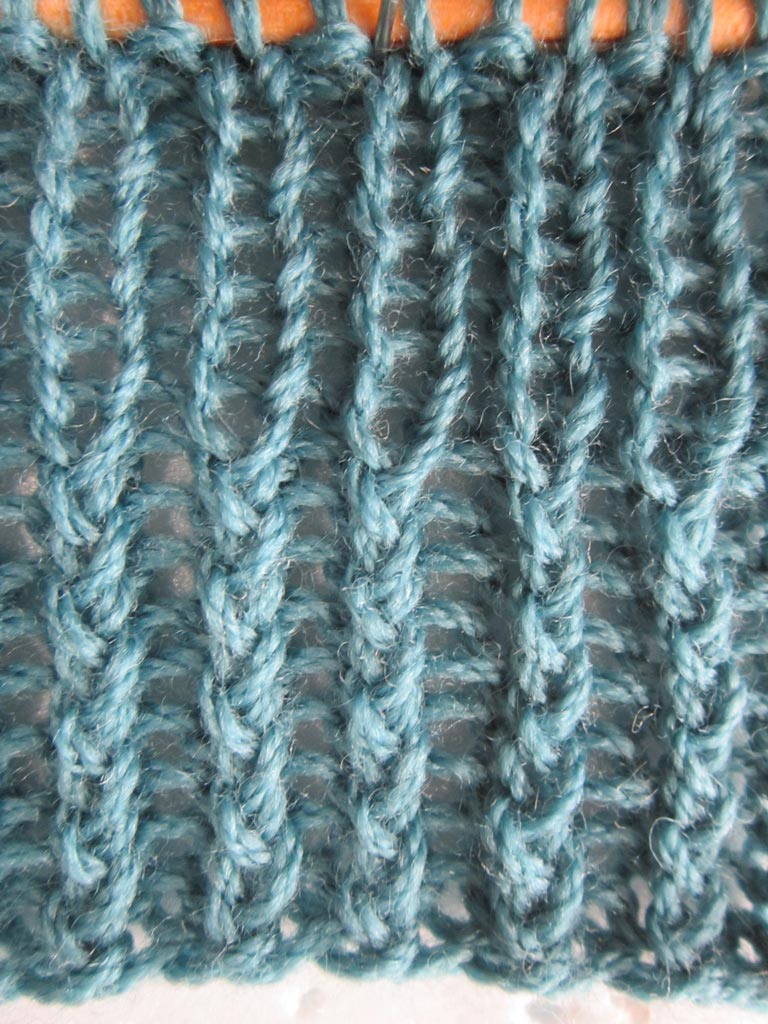
To start Easy Elegance Mitts, you can jump right in and temporarily defer any thought for how you will introduce the beads into your knitting. So go ahead and cast on and work the first 7 rounds that only use your Main Yarn without beads. Some of the rounds use Plaited Ribbing. If you missed seeing the article on that, you can review here (or you can substitute plain k1, p1 ribbing if you prefer something simpler).

For the rounds that use beaded accent yarn, you can use either

1. beaded yarn already plied with beads

silk plied with beads by Tilli Tomas

or

2. supplemental thread strung with beads that will be knitted along with the main yarn

String beads on supplemental thread

I am going to cover these scenarios separately, as there are some different considerations to each. You can focus now on whichever applies to what you are using to make your Mitts. But don’t hesitate to read through the other scenario, as it might might be something want to try at a later time.

Tips for Using Yarn Already Plied with Beads

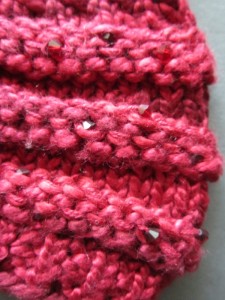
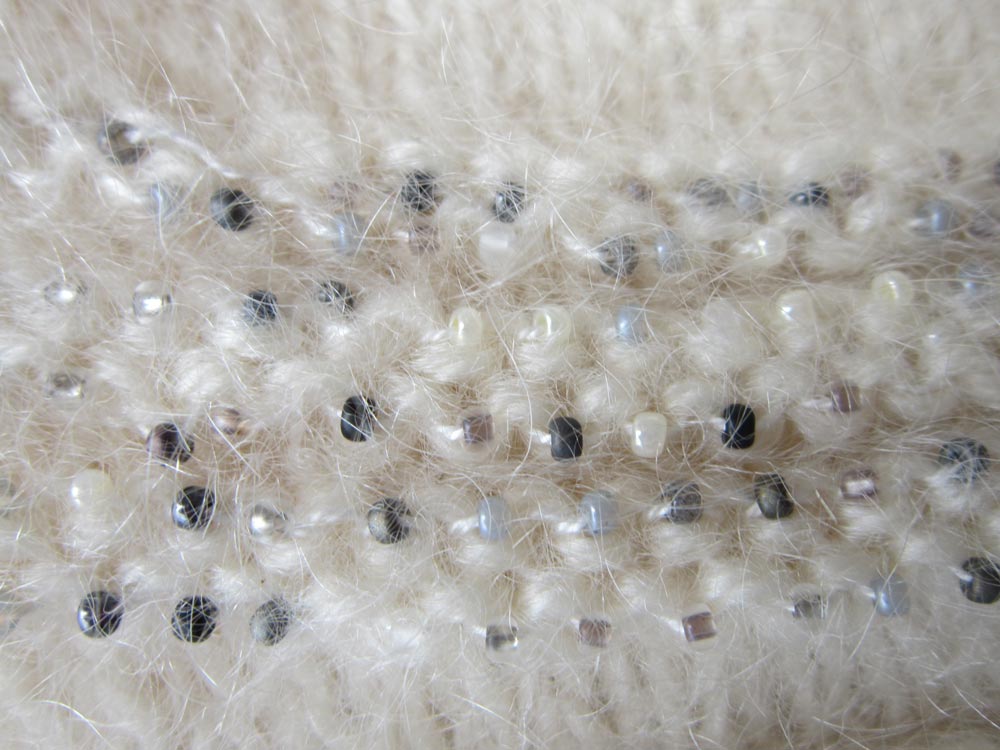
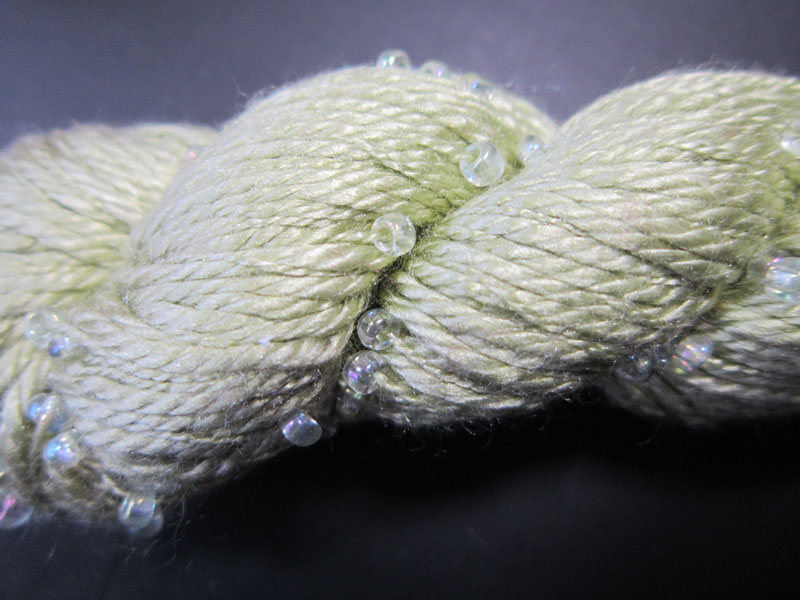
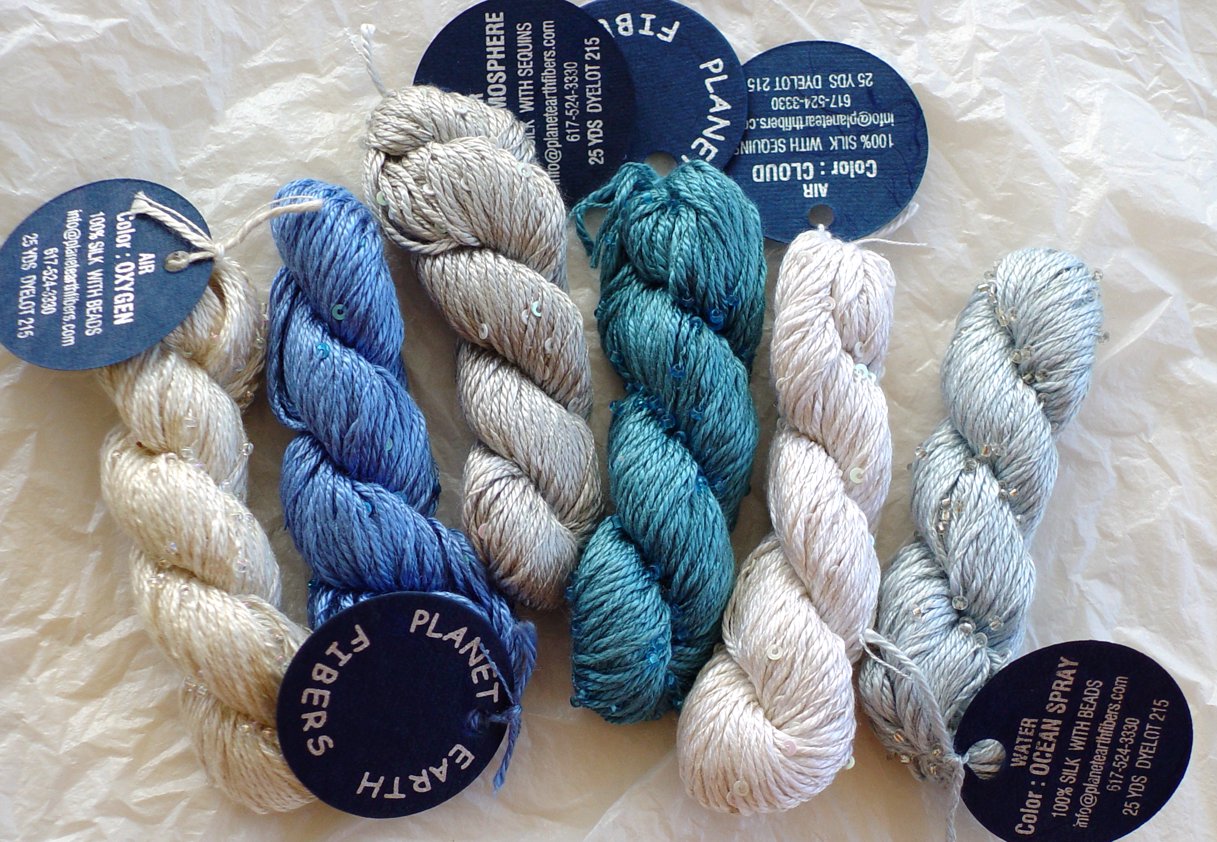
When using yarn that has been pre-strung and plied with crystals/beads, you want to make every bead show up on the outer surface of the fabric where it will be seen, rather than hiding on the wrong side (especially expensive crystals or other expensive beaded yarn!!) Here are tips to help you make the most of the beaded accent yarn you use for your Easy Elegance Mitts.

In the purl rnds using the accent yarn (A) —

When you are about to encounter a crystal/bead, nudge it either a bit forward or further along on the yarn so that the bead ends up positioned on the running thread between two purl sts, thus helping it stay on the outer surface of the fabric.

In the rnd that follows a purl rnd using accent yarn —

Before making each new stitch, be careful that the beads stay between the sts in the row below. If a bead wants to wander, just nudge it back into place before making the new stitch. Once the new stitch has been completed, the bead below will be locked into place and stay on the outer surface of the fabric to show to fullest effect.

silk plied with crystals by Tilli Tomas

With purchased beaded yarn, how many beads can show in your knitting will depend on the spacing at which the beads, crystals or sequins have been incorporated into the yarn by the manufacturer. Usually, this will result in beads showing up several stitches apart, and sometimes rather randomly. It’s a nice serendipitous, and fun way to knit with beads. Just be sure to use these tips to make every bead show to its fullest to get the most bling for your buck.

knitting with yarn plied with beads/crystals

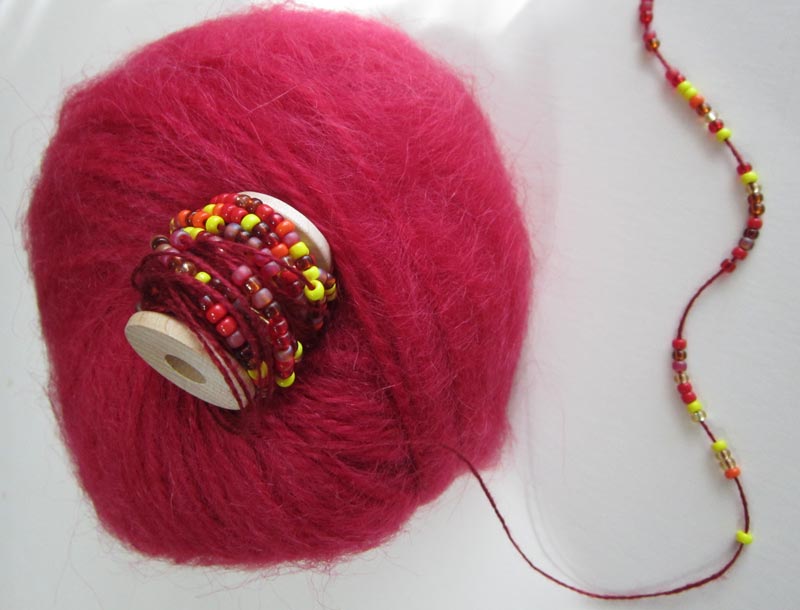
Tips for Using Supplemental Thread Strung with Beads

This method involves holding supplemental thread strung with beads together with your main project yarn. You have ultimate control over how you want your beads to be spaced, e.g. you can do every stitch (assuming you have enough beads), but do take into consideration bead size vs. stitch gauge so that if using larger beads they don’t too crowded.

Before beginning the rounds of the Easy Elegance Mitts that call for using Beaded Accent yarn, you will want to string your supplemental thread with enough beads for one of the mitts. Here are some guidelines for number of beads to string for a Mitt —

If you are using size 8/0 beads (such as those I sent out to those of you who purchased Supplies Paks for the Mitts), I like to put a bead every stitch of the Beaded Accent rounds. For each mitt, you will need 192 beads if making the first size (or 216 beads if making the larger size).

How did I calculate this? There are 6 rounds using Beaded Accent yarn. Each round as 32[36] stitches. 6 x 32[36] = 192[216] beads.

If you are incorporating larger size beads or expensive crystals, I’d advise spacing out the beads/crystals to use fewer of them. Consider only every other stitch, or maybe even every 4th stitch. Then stagger their placement on the following purl-beaded round (unless you want them to line up in a column).

Calculations for number of beads needed for a Mitt:

– if placing every other stitch: 192[216] / 2 = 96[108] beads

– if placing every 4th stitch: 192[216] / 4 = 48[54] beads

Technique for working the Beaded Accent rounds of Easy Elegance Mitts:

Hold the supplemental thread together with the main yarn as you purl each stitch. Before each stitch where you want a bead to be placed, slide a bead next to the right-hand needle before making next stitch, then purl 1 with both the supplemental thread + main yarn. Take care that the bead is not pulled through the loop while making new stitch and that bead remains on running thread between stitches to front of fabric.

It’s that easy — have fun! It might be a little slow-going to begin with, but with practice, you will go faster. I think that you will find the bling worth it.

Beads sparkle amidst the soft halo of brushed mohair

The Beading Truth

What both methods share: Remember that beads want to go to the bumpy (i.e. purl) side.  Since Easy Elegance Mitts are worked in the round from the right-side of the fabric, that is why the design calls for purling.

Posted in Tips & Techniques | 5 Comments

Let’s Twist! Plaited Ribbing

I am showing my age – ha! ha! I must admit that when I started this article off with the title of “Let’s Twist”, as in knitting the Plaited Ribbing for the Easy Elegance Mitts, I wanted to start singing ala Chubby Checker.

Getting back to knitting …

Plaited Ribbing is a variation of k1, p1 ribbing that alternates rounds of the knit stitch being worked as a k1 twist to the left with a rounds of that knit stitch twisted to the right. This keeps the twisted column of ribbed stitches balanced, while giving a bit tighter definition of the knit column of stitches than in regular ribbing.

Easy Elegance Mitts

The k1tblB Special Technique for Plaited Ribbing

To make Plaited Ribbing easier to do without remounting stitches for the right-twisted stitch, I have included instructions for the k1tblB in the Abbreviations and Special Techniques section of your Easy Elegance Mitts pattern. Here is a recap:

* k1tblB wrapping yarn clockwise to avoid re-mounting the stitch for a right-twisted stitch (k1tblB = k1tbl to twist the stitch to the left + wrapping yarn in opposite direction of normal)

Reverse-mounted Stitch

Reverse-mounted Stitch

* k1tfl on following row of a k1tblB st completes the right-twisted stitch

Knitting into Front Loop of Reverse-mounted Stitch

Knitting into Front Loop of Reverse-mounted Stitch

Substituting Plain k1, p1 Ribbing

I will qualify this by also saying that if you have a highly textured yarn, the extra definition of Plaited Ribbing is probably not going to show up. So doing a plain k1, p1 ribbing can be substituted without little consequence.

In smooth yarn, however, the difference between Plaited Ribbing and plain k1, p1 Ribbing is quite striking. Here is a visual comparison to see it for yourself!

Plaited Ribbing compared to plain k1p1 ribbing

Lower: Plaited Ribbing
Upper: Plain k1, p1 ribbing

Substituting k1tbl, p1 Ribbing

You could substitute k1tbl, p1 ribbing for the Plaited Ribbing, but that is likely to bias to the left (especially if doing for a longer length such as in the wrist area of the mitts). Even with alternating a round of k1, p1 with a round of k1tbl, p1 — my experience is that most yarns will skew.

Bottom line

I suggest using either

1. the Plaited Ribbing as given in the pattern, or

2. a simple k1, p1.

The Plaited Ribbing will show up best in smooth, yarns. For textured yarns, a simple k1, p1 is ok to substitute.

Posted in Tips & Techniques | 4 Comments

Any Beads Any Yarn

Free yourself to use any bead size with any yarn, even textured yarns

With this month’s Easy Elegance Mitts you have the chance to use beads in ways we have not seen in our previous KnitHeartStrings KAL’s.

Beaded yarns available for purchase are beautiful, but can also be pricey. I’ve designed Easy Elegance Mitts to give you an excuse to indulge yourself with a bit of extravagant yarn that you might have been eyeing at your local yarn shop.

beaded-accent-yarn-mini-skein-silk-with-beads

I am also going to give you a couple of other ways to use any size beads with any yarn, thus creating your own beaded accent yarn.

Ready-made Beaded Accent Yarn

Purchased beaded yarns are usually loosely plied with a thin thread upon which the beads  (or sequins or even crystals) are carried. The advantage of buying these beaded accent yarns is that they are ready for you to knit with.

beaded-accent-yarn-silk-plied-with-crystals

Mariel’s Crystals by Tilli Tomas – now discontinued but still beautiful eye candy: Silk Plied with Swarovski Crystals

Some commercially beaded yarns come in mini-skeins, which  is a perfect size for the few accent rounds in projects like Easy Elegance Mitts, as well as keeping the cost down rather than buying a larger  skein.

Mini Skeins of Beaded Accent Silk Yarn

Mini Skeins of Beaded Accent Silk Yarn

In these pre-plied purchased yarns, the spacing will be dependent on what has been determined by the manufacturer, plus there might be some fiddling to show the beads to full effect (you wouldn’t want those expensive crystals or pretty beads to hide on the inside out of sight!). Hang on — I will have a support article coming up soon on that, too.

beaded-accent-yarn-silk-plied-with-beads

Make It Yourself: Accenting Yarn with Beads

An alternative to using ready-made beaded yarn is to knit accent bead rows/rounds with the main yarn along with a supplemental thread upon which beads have been strung.

This frees you to use beads with tiny holes to accent thicker yarns, and even textured yarns.

Of course, you’ll still want to choose a supplemental thread that is strong, smooth  and thin enough to go through the holes in the beads. Usually I pick a supplemental thread color that will blend with the main yarn. But there is no rule that you could not choose some other color that you feel coordinates pleasingly.

An advantage in using the method of knitting with a supplemental thread  strung with beads is that you have total control over their placement.

For those who have gotten the Supplies Paks for Easy Elegance Mitts at the KnitHeartStrings Online Store, go ahead and string the Tencel thread in your pak now with the supplied beads if you have not already done so. Then it will be ready to use when you come to the beaded accent yarn rounds.

String beads on supplemental thread

Making Your Own Plied Beaded Yarn

Another possibility is to ply the strung beads on your supplemental thread with some of your main yarn before you knit the accented rows/rounds.

Basically you would be simulating the commercially available beaded accent yarns with this method. There is one advantage in doing your own plying though — you can plan your spacing to your own specifications. It takes planning and careful attention to gauge, but can be done. Or you can just let serendipity take over and get random placement.

I am not going further into details for plying your own beaded yarn, at least at this time for this KAL, but did want to mention.

Beads WITH the yarn, rather than ON the yarn

I hope with this month’s project for Easy Elegance Mitts, the possibilities for using any beads WITH any yarn will open to you. Basically, the strategy is to use a “helper” thin thread to carry beads along with the main yarn, rather than being constrained to only beads that can be put ON the main yarn.

Posted in Bits of Beads | 7 Comments

Vote Your Favorites in the KAL Photo Challenge

Give some love to the KnitHeartStrings members who submitted photos of their Beaded Crescent Neck Lace KAL projects to the new monthly Photo Challenge.

Vote now for your favorites

Voting takes place Nov 10 – 15, 2013. Any KnitHeartStrings member can vote for up to 3 of their favorites. The winner will be selected for the photo with most votes, and will receive their choice of pattern from the KnitHeartStrings Online Store. In case of a tie, a random selection will be made from the photos with most votes.

Some entries can be clicked to take you to the member’s Ravelry project page for more information and larger pictures.

Enjoy the eye candy and Vote Here!

Posted in Just for Fun | Leave a comment

Dress up time! Easy Elegance Mitts pattern free download for members

The holidays are coming soon. Knit these fingerless gloves now and dress up with Easy Elegance. They are easy to make, yet look so classy.

Time-limited Offer

The Easy Elegance Mitts pattern is now available free to download by  KnitHeartStrings members through the end of November 2013.

Knit along this month while trying new things and learning with bonus bit-size tutorials, tips & techniques.

h139-epostcard

Learn And Knit A Long

Check back soon. I will be posting photo tutorials, tips & techniques to help you get the most out of this month’s project KAL. Next up: Making Your Own Beaded Accent Yarn

Posted in Bits of Beads | Leave a comment

Articles for Previous KAL’s and a Deal on Patterns

Can you believe? Since the start of KnitHeartStrings at the end of January 2012, we’ve had 21 monthly knit-and-learn-alongs total (with 10 completed so far in 2013 and doing our 11th in 2013 with November’s KAL of Easy Elegance Mitts).

projects in the BOBBOL 2013 series

Even if you missed some of the knit-and-learn-alongs, as a KnitHeartStrings member* you have free access to the extra bonus tutorials, tips & techniques articles.

Previous KAL Articles

There is lots of good information in the articles to help you enjoy your knitting even more (and who knows, you might even pick up a tip or trick along the way).

For your convenience in locating articles for patterns we’ve done in Bits of Lace 2012 or BOBBOL 2013 so far, I list all patterns and articles on the Previous KAL’s page. I plan to continue to do so, assuming you find this helpful? Let me know.

A Deal for Premium Level Members

If you missed getting any patterns last year for Bits of Lace 2012, take advantage of the  special 50% off discount in the Premium Area to complete your set of Bits of Lace patterns.

Projects in the Bits of Lace 2012 Series

*Free Trial members have access to all articles through the end of 2013. A Basic Level member plan with a small subscription fee will be announced in December 2013 so that you can continue to have access to all articles and to receive the free pattern download for the monthly project. Premium Level members continue to have access to all articles for the duration of your Premium period, plus get extra VIP benefits.

Join or Upgrade

Posted in Bits of Beads AND Lace | Tagged | Leave a comment