Tips for Working with Lots of Strung Beads

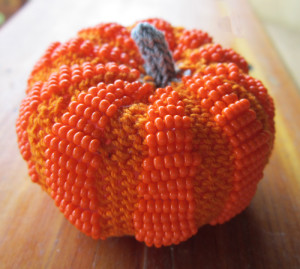
Little Beaded Pumpkin is the first of our BOBBOL projects that has used a LOT of strung beads. Both in total, as well as multiple beads being placed at the same time between stitches.

Little Beaded Pumpkin - almost finished knitting

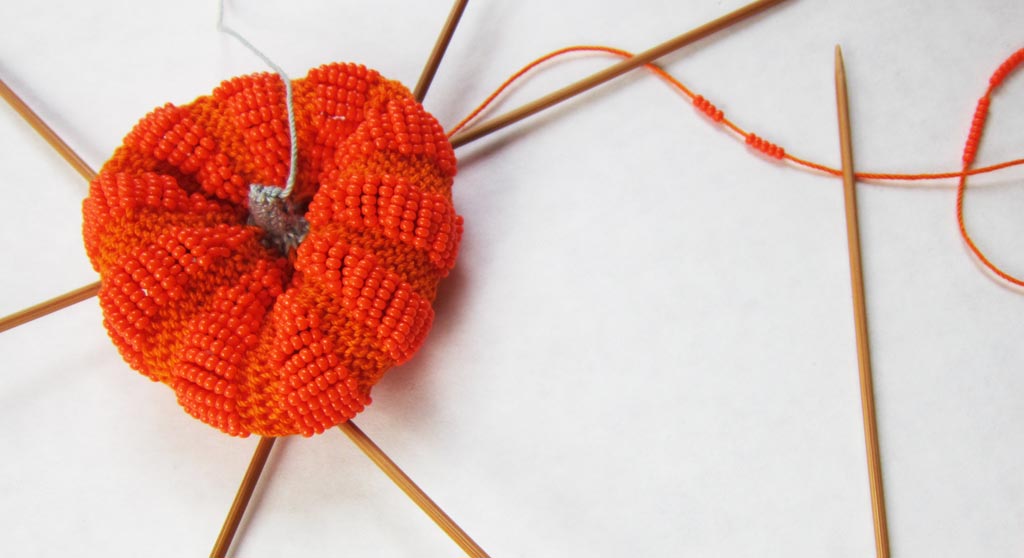
Keeping that in mind, I wanted to take this opportunity to share some tips to help making working with lots of beads successful and enjoyable, both when knitting your little pumpkins as well as for your other projects in the future that might use lots of beads.

Tip: Throttle Your Transfer Speed

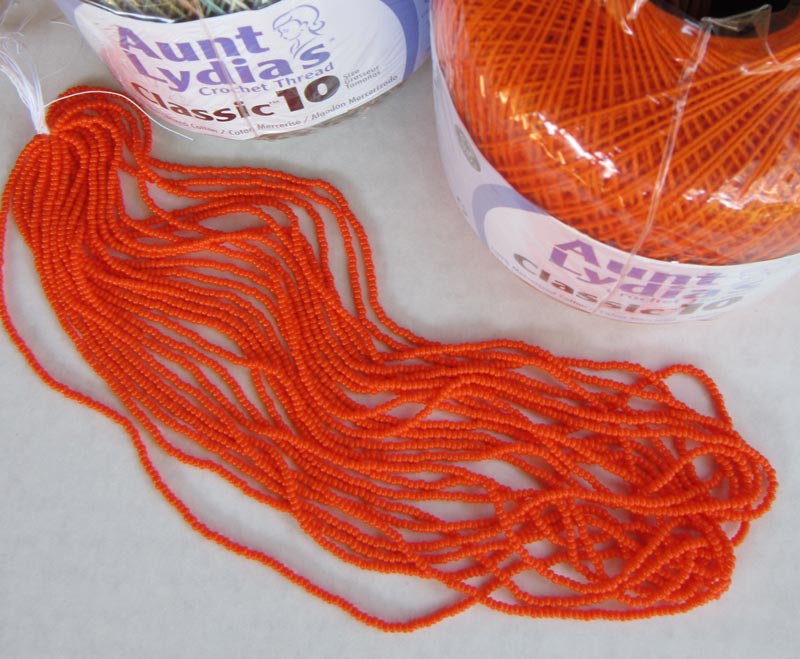
When confronted with the task of transferring pre-strung strands of bead hanks to your project yarn, there is a temptation to speed up the job by sliding ALL the beads on a strand AT THE SAME TIME over the knot onto yarn. This is usually a guarantee of disaster and the thread will break because of too much stress.

That is why I specifically use the word “some” in the Transferring Pre-Strung Beads photo tutorial where I demonstrate the step to “Slide some beads over the knotted loop …”

Remember that in this method of transferring beads you are going over a double thickness to begin with as you transition from the knotted loop in the pre-strung string onto your project yarn. That transition can be a tighter fit than maybe you are expecting. Throttle Your Transfer Speed and don’t try to push more than a few beads at a time onto the thread (sometimes just one bead if that helps, at least until you get things started).

Tip: Rule of Hand

After the prep work of getting the beads strung on your project yarn, push the beads down along the yarn until needed. As you work your project, it is likely that you will use up yarn more quickly than the beads are used up. So periodically you will again need to push beads out of the way down along the yarn some more.

It is tempting to want to push ALL of the beads down along the yarn at the same time. Unless the yarn is very slick, or there are just a few beads in total that need to be moved, you are likely to meet resistance. If you force, you risk damaging, fraying or even breaking your yarn (and what a mess that is when beads start flying off! if this happens this to you, unfortunately you won’t need to learn the lesson twice).

If you meet resistance when pushing beads along the yarn, use the Rule of Hand to preserve the integrity of your yarn: Only push the amount of beads you can comfortably cradle in your hand. By letting your hand give support while pushing, strain and stress on the yarn is minimized.

OK, I admit that I made up the name of that “rule” so I doubt you will hear it elsewhere. But I think you get the idea, lol.

Tip: Be a Bead Counter

This is a good time to review the Pre-counting Beads for a Row article from earlier this year. When working in rounds rather than rows,  the same good practices apply to help you place the correct number of beads.

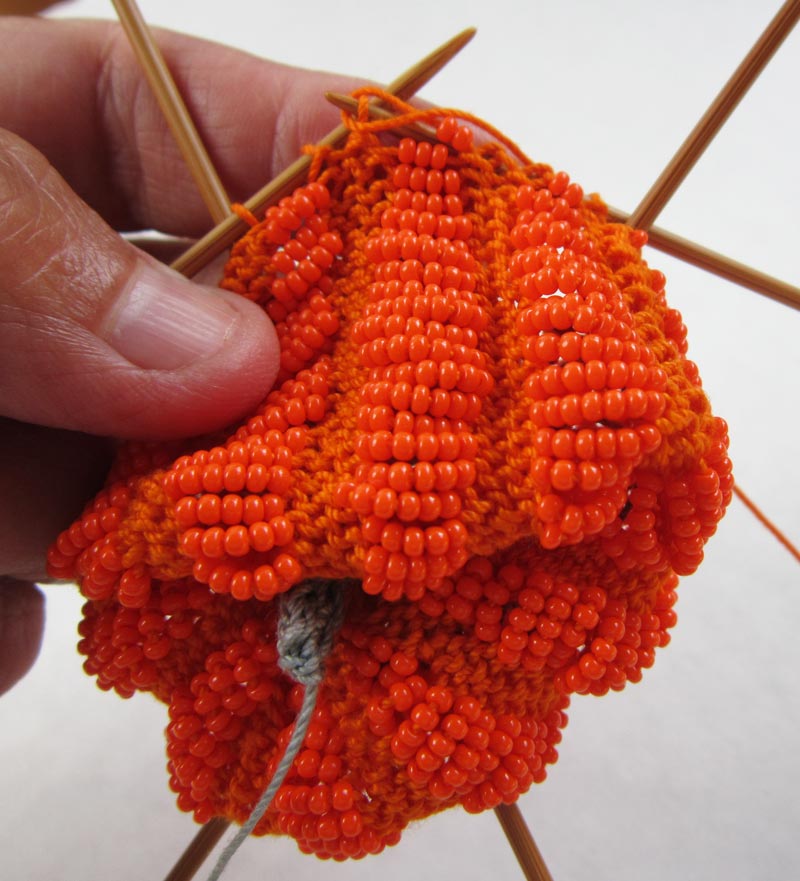
The additional challenge with Little Beaded Pumpkin and other similar Structural Beaded Knitting projects where the beads are actually creating the form, is to accurately count the number of beads being slid between stitches. A good practice is to Be a Bead Counter with the motto “count twice knit once”:

  1. count the beads as you move them close to the needle
  2. re-count the beads (out loud if necessary to get in the habit)

Now you are ready to knit (or purl) the next stitch following where the beads have been slid.

Being a Bead Counter will increase your chances to get it right the first time rather than having to rip and re-knit.

Counting and sliding beads in place

Bead happy!

Posted in Tips & Techniques | Tagged | Leave a comment

Preview of October KAL pattern

For your planning and shopping pleasure, you can get an early look at the cover page of the Beaded Crescent Neck Lace pattern that will be our October KAL. Gather your supplies and get ready to knit for October’s KAL!

simply beautiful — lace for your neck

Adorn your neckline with a crescent of color and beads.

Beaded Crescent Neck Lace in Crystal Palace Yarns Panda Silk

Beaded Crescent Neck Lace in Crystal Palace Yarns Panda Silk

Free Level Members will be able to download the complete pattern for free beginning October 1 from the Free Area. Not a KnitHeartStrings member yet? Join now for free.

Bonus for Premium Level Members! Get free, early access to the complete pattern starting September 25, 2013 by using the special Ravelry Delivery coupon code that has been set up in the Premium Area.

I’m already getting good comments about Beaded Crescent Neck Lace and it looks like it is going to be one of our most popular KAL’s yet. Let your friends know about it, too. I don’t want anyone to miss out! Tweet your friends

Posted in Bits of Beads AND Lace | 1 Comment

Thinking of I-cord as a type of circular knitting on 2 needles

Although Little Beaded Pumpkin begins at the stem by knitting on just 2 needles, this project is technically knitted entirely in the round.

That is because I-cord (first named by the renowned Elizabeth Zimmerman as Idiot Cord because of its simplicity) creates a seamless tube of knitting. You can think of I-cord as a type of circular knitting on 2 needles.

The Simplicity of Working Rows to Make Rounds

The trick that makes I-cord a circular technique is that the rows of stitches are always worked in the same direction. The working yarn straddles the distance between the last stitch of completed row and the first stitch of the next row. Thus the yarn is actually completing a circle, and what results are rounds of knitting!

A vital key to success is that the number of stitches is relatively small (usually 3 to 4) so that the distance the working yarn spans between the last stitch of a row and the first stitch of the next row does not become too great.

Tip: This distance can be made  somewhat less by giving a little tug on the yarn as you begin wrapping the yarn around the needle to make the first stitch of the row.

Pushing the Limits of I-cord

We made I-cord for the stem of last fall’s Bits of Lace Oak Leaf. That I-cord stem was done on just 3 stitches; a typical number of stitches for I-cord.

Lacy Oak Leaf Medallion

Bits of Lace Oak Leaf with I-cord stem

Pushing the limits of I-cord, I chose a 5-stitch I-cord stem so that it would neatly increase up to the 10 section repeat of this month’s little pumpkin project. Those 5 stitches are more than the typical number of most I-cords. But it works because we are using finer thread and smaller needles than usual.

I-cord center start

I-cord center start

Using I-cord as a Center-out Circular Start

Earlier this year for the Pinwheel Flower project, we learned about an easy “cheating” center start.

This month’s little pumpkin project gives me a chance to let you see how I-cord can also be used to assist in making an easy center start for the remainder of this circular project.

In the case of the pumpkin, the I-cord piece is permanently part of the project. However, you can also use this idea for other center-out circular projects by working a small piece of I-cord in a waste thread that is later carefully removed after you’ve got the project underway in the real project yarn/thread. (Of course, before removing, secure the stitch loops of the project yarn/thread.)

Posted in Tips & Techniques | Tagged , , | 1 Comment

Structural Beaded Knitting

The beaded projects we’ve had for our KAL’s so far have basically just incorporated beads as an embellishment. The beads have been artistically attractive, but they have not been structurally vital to the form of the knitted object. For example, if the beads had not been used in Dolly’s Top-Down Tri Shawl or the Holiday Mini Sock, we still would have ended up with a shawl or a sock.

That is not the case with this month’s Little Beaded Pumpkin. The beading technique of sliding several beads between stitches actually creates the form. If the beads were omitted, we would have nothing that looks remotely like a pumpkin!

Here is the pumpkin after the knitting is nearly completed. Even before being stuffed lightly to plump the pumpkin, the form is clearly recognizable.

Beaded Pumpkin in progress

The structure of the beads themselves gives this project its delightful appeal.

Tip: Work stitches firmly on either side of the beads to keep them in place and from wandering into the neighboring stitches.

Posted in Tips & Techniques | Tagged | 1 Comment

Transferring Strings of Beads

Although I usually do not use Czech seed beads, I sometimes do for purely decorative items. Such is the case for this month’s KAL project for a little beaded pumpkin.

Czech seed beads are usually sold in hanks of beads that have been pre-strung on a thin temporary string. Each string usually is strung with 20″ of beads. There are twelve of these 20″ strands of beads that are looped in half and tied together at the top, thus comprising what is called a hank of beads.

Hank of Seed Beads

Hank of Seed Beads

When a decorative project calls for a lot of tiny seed beads in the same color, such as our little pumpkin, we can take advantage of the beads like this that are pre-strung. Here is a step-by-step photo tutorial showing how to quickly transfer beads from the thin temporary thread onto your regular project thread.

p.s. This tutorial is also hot-linked in your Little Beaded Pumpkin pattern. If you are working from your pattern while online, you can click the word “Transfer” in the String Beads section of the pattern and that will bring up the tutorial for you.

p.p.s. For Premium Level members, the Transferring Pre-strung Beads tutorial is also available as a free download in PDF format in the PDF Articles area.

Posted in Bits of Beads | Tagged | 2 Comments

Tiny and adorable – Knit a Little Beaded Pumpkin

I am excited to announce that the Little Beaded Pumpkin pattern is available now for free download by KnitHeartStrings members doing the September KAL.

Little Beaded Pumpkin

Remember to be logged into your KnitHeartStrings member account. Then either go to the FREE AREA of the site, or directly to the pattern page here.

If you are a Premium Level member of KnitHeartStrings (thank you!), you can also get the Little Beaded Pumpkin delivered to your Ravelry library for free. Here is your coupon (or you can access the link to the page with the Ravelry coupon anytime from the Premium Area of this site).

Remember that this free download is a time-limited offer expiring at the end of this month, September 30, 2013, and is for active registered members of KnitHeartStrings (either at the Free Level or Premium Level).

Happy knitting!

p.s. Not a member of KnitHeartStrings yet? To tempt you, here is a free view of the cover page for this month’s KAL pattern. I hope you will  JOIN US to knit-along this month and  future KAL’s.

Sample Cover Page of Little Beaded Pumpkin

Posted in Bits of Beads | Tagged , , | 3 Comments

Shopping List for Little Beaded Pumpkin KAL

Forget the pumpkin pie. This little beaded pumpkin
will be the hit of your fall holiday decorating and entertaining.

For September’s KAL project, we are totally into beads. Little Beaded Pumpkin is an adorable, miniature pumpkin knitted with tiny seed beads and thread.

Little Beaded PumpkinHere is the Shopping List so you can get your materials together now and be ready to start knitting along when the free pattern download link for members is posted later this week.

Shopping List

  • Crochet thread size 10 or equivalent (e.g. size 8 perle cotton):
    – 10 yards orange
    – 1 yard green
  • Knitting needles size 0 (2 mm) suggested for gauge of 12 sts = 1″: set of 4 double point needles (Note: non-slippery wood or bamboo preferred)
  • 4 – 20″ strands of pre-strung size 11/0 seed beads in color dark orange (if you are stringing your own loose beads, you will need 1330 beads, approx 15g) Note: size 10/0 beads can be substituted, if needed
  • Tapestry needle
  • About 24″ of 12″-wide clear saran wrap (or other material of your choice for lightly stuffing the pumpkin to give it stability)

Beads and thread for Little Beaded Pumpkin(at left) I used Aunt Lydia’s Classic Crochet Size 10 in colors Pumpkin and Aspen Multi. (for the green of the pumpkin stem, I used a length of green from the Aspen Multi rather than getting an entire ball of green!).

Pre-strung beads come in hanks of 12 strands with each strand usually 20″ long. One hank will make 3 pumpkins.

Pattern

I will post the Little Beaded Pumpkin pattern in a couple of days. When available, the pattern will be free to KnitHeartStrings.com members during September. Meantime, I wanted to give you a heads up so you can get your beads, thread and needles ready to knit!

Be sure to let your knitting friends know that they can join KnitHeartStrings for free and get  a free pattern, too. Thank you for sharing and spreading the word.

Posted in Bits of Beads | Tagged , | Leave a comment