
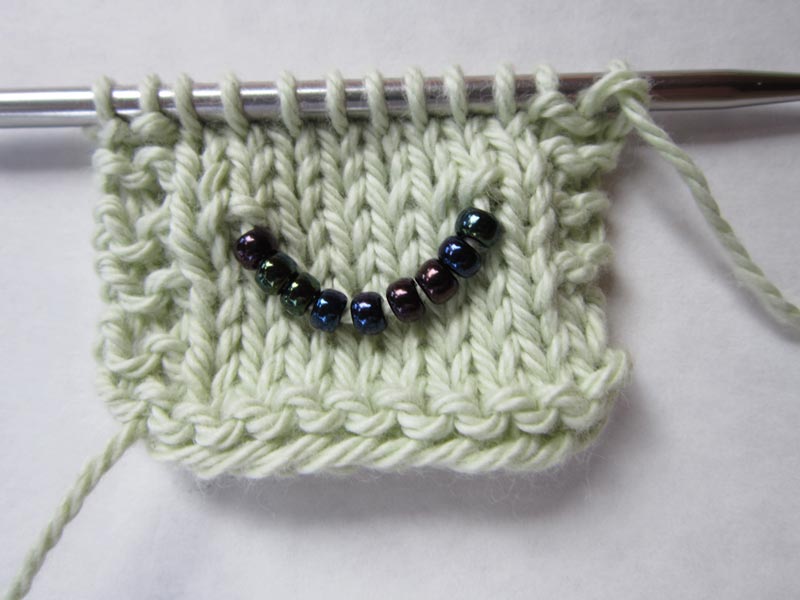
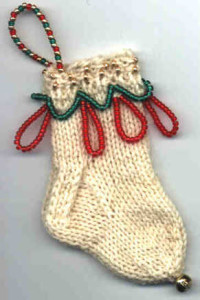
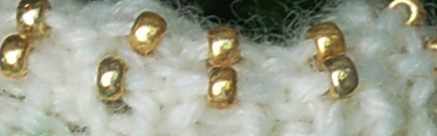
The 3rd of the 3 beaded knitting techniques used in the Holiday Beaded Mini Sock is for creating bead fringe, a closed loop of beads. In the design of the Bells on My Toes mini sock, there is a loop of red beads positioned beneath each point where a swag of green beads attaches to the sock leg.
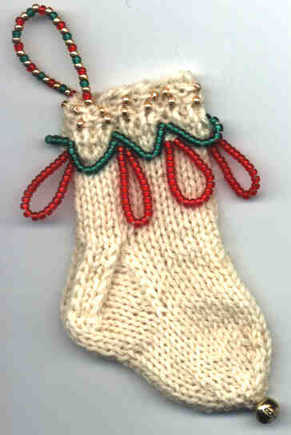
Important Note: Since we are knitting this sock top-down from cuff to toe, the loops of beads are knit after the swags. Therefore while knitting this top-down sock leg, the loops of red beads will appear to be oriented above the swags of green beads.
To create a Bead Fringe Loop
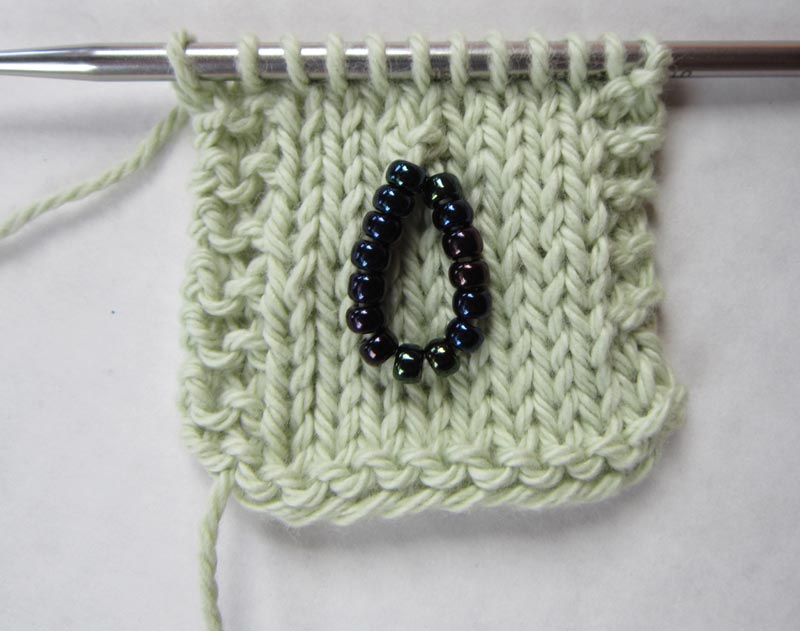
Prerequisite. However many beads needed for the fringe loop(s) should have previously been strung on the working yarn.
Note: 2 rows are required to complete a bead fringe loop.
1st Row —
Step a: p1 but DO NOT remove stitch from left hand needle yet.
Step b: Slide several beads along the working yarn so that they are scooted up close together, with the first bead right next to the p1 stitch that you made in Step a.
Step c: k into the back of the same stitch that you purled into and discard the stitch from the left hand needle.
Step c increases a stitch for each fringe loop you have create in the row. For the Holiday Beaded Mini Sock, we create 6 bead fringe loops, therefore the stitches in the row increase from 24 to 30.
2nd Row —
p2tog the p1 stitch and the k into back of stitch of the 1st row.
This p2tog step restores the stitch count to the original number (i.e. 24 stitches in the case of the Holiday Beaded Mini Sock).
Note that the p2tog “locks in” the top of each beaded fringe loop, thus making it look tidy.
Tip: Before completing the p2tog, be careful that the beads have not slipped to the back of the work. If so, coax them to the front again, and then p2tog.
Remember that since we are working the mini sock from cuff down, the bead fringe loop will actually hang in the opposite direction from that when we are knitting it.

Although we might usually think of “fringe” as being at the edge of something, I have used this technique within the leg of the Bells on Your Toes mini sock for decorative effect. Remember the approach used here in Rnds 9 and 10 of this mini sock pattern for the next time you may want to do a beaded fringe on a scarf, shawl, etc. You can adjust the spacing of the k stitches and the number of beads as you wish.
Happy Christmas in July!
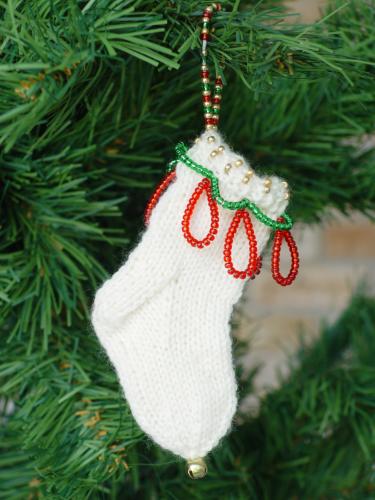
Bells On My Toes Holiday Beaded Mini Sock
I hope you have found your beaded knitting experience to be fun and rewarding, and that you are inspired to do even more beaded knitting.
Remember that if you have questions or comments, you can post here.
Member Gallery
I invite you to upload photos your Beaded Holiday Mini Sock or and any other inspired variations for display in the KnitHeartStrings Member Gallery. Thank you for sharing.


 HeartStrings FiberArts
 Knitting Bits of Lace on Facebook
 Ravelry Store