Beaded Garter Stitch: A Peek Behind the Scenes

Beaded Garter Stitch is exactly what it sounds like: garter stitch with beads. Beyond this simplistic explanation, there are several intriguing things about this beading technique. Let’s take a closer look at Beaded Garter Stitch —

Beaded Garter Stitch is a Type of Beaded Knitting

A prime characteristic of Beaded Knitting is that the beads are between stitches, rather than on the stitches themselves.

Beads are between stitches, rather than on the stitches themselves

Beads are between stitches, rather than on the stitches themselves

Because the bead is on the running thread between the stitches, this places the bead in it’s distinctive upright orientation.

Basics of the Beaded Knitting Technique

To do Beaded Knitting:

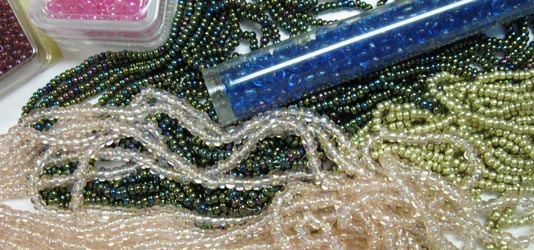
  • Beads are strung onto the yarn with which you will be knitting.
  • The beads are pushed down along your yarn until needed.
  • When you come to a place in the knitted fabric where you want a bead(s), slide one (or more) beads into place right next to the last stitch worked on your right-hand needle. Work the next stitch, taking care that the bead(s) do not come through the new stitch.
Slide a bead next to right-hand needle

Slide a bead next to right-hand needle

Tip: I like to insert my needle into the next stitch (but not make actually make the new stitch yet) before I slide the bead next to the right-hand needle. This stabilizes both needles so that I can free either my right hand or left hand to move the beads as needed.

Slide Bead and Knit Next Stitch

Close-up of Slide Bead and Knit Next Stitch

Work Beads on Wrong Side Rows

In Beaded Garter Stitch, you work the bead(s) on wrong side rows. The opposite side is where the beaded pattern is actually going to show up. So you might at first feel like you need to peek around to the other side to see what is going on when you are doing your beading rows. Don’t worry, you will eventually get over this urge, lol.

This is because the beads want to go to the bumpy side of the row. If you have ever knit with eyelash yarn, you know how the strings want to go the bumpy purl side of the fabric, rather than stay on the smooth stockinette side. It is a similar thing that is happening with the beads when they are placed between knit stitches.

The 2 Sides of Beaded Garter Stitch

Even though garter stitch by itself is inherently reversible, Beaded Garter Stitch makes the fabric have a definite Right Side and Wrong Side.

The Right Side is the side where the beaded pattern shows up (even though the beads were worked on Wrong Side rows).

The right side of beaded garter stitch close-upThe Wrong side of Beaded Garter Stitch just looks like — well, garter stitch.

the wrong side of beaded garter stitch closeup

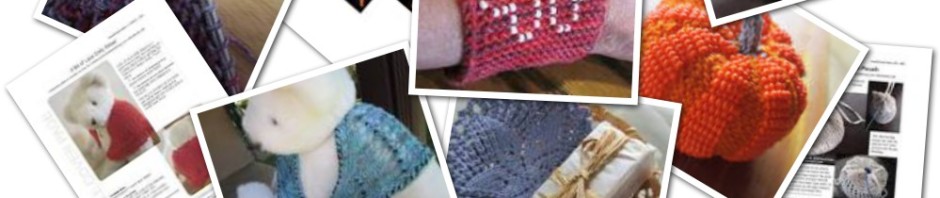
You can’t even see beads on the wrong side. This is an advantage for articles to be used for warmth; i.e. the beads do not touch your skin. Examples where I have put this to good use in beaded designs are wrist warmers and socks with sideways-knitted beaded garter stitch cuffs; e.g. Beaded FleuronBeaded Winter Wonderland and Beaded Shamrock.

Even-count Designs

Because the gauge of garter stitch is basically 2 rows = 1 stitch, the fabric is a great canvas on which to design even-count designs or even adapt simple even-count charts from other fiber disciplines such as cross-stitch, needlepoint and filet crochet.

Tip: Since beads are placed from the wrong side when doing Beaded Garter Stitch, be sure to mirror your chart if there is a definite left and right to your even-count design.

Simple, Almost Mindless Fun

Best of all, Beaded Garter Stitch is simple enough for even a beginner knitter to do. And because it is almost mindless, it can appeal to even the most advanced knitters when they just want something fun to work on that doesn’t take much attention.

Building up the design with beads can be purely addictive. I hope you are starting to get excited about knitting with beads. This is just the beginning. I have lots more to share with you in BOBBOL 2013.

Posted in Tips & Techniques | Tagged , | 6 Comments

Combining beads and yarn: Learning to make good choices

The importance of selecting quality materials for your projects cannot be underestimated. After all, you put time and talent into your project, so you deserve the best choices! But what aspects of “quality” should you really be concerned about for knitting projects that combine beads and yarn/thread?

Here is a short checklist to start things off —

Quality Characteristics of Beads

  • Uniformity / Consistency
    The fewer the defects, the less hassle and waste you will have.
  • Smoothness / No Sharp or Rough Edges
    Avoid bead brands/types that have rough/sharp edges. Even with the most abrasion-resistant yarn, sharp glass beads will eventually cut through yarn like a knife.
  • Lasting Color/Finish
    If you are using beads for a wearable item, you want the beads to hold up to the cleaning process. Even with hand washing or gentle machine washing (turned inside out or placed in a net bag), use quality beads that will retain their original beautiful color and finish.

Tip: The Japanese-manufactured seed beads for knitting are usually the most consistently uniform, smooth and have the most stable colors/finishes. My personal favorite brand is Miyuki.

For the Beaded Garter Stitch in this month’s Beading Hearts Friendship Bracelet, you first string beads onto the yarn you will be knitting with. For Beaded Garter Stitch (as well as other beading techniques that use strung beads), you will slide one or more beads into place as needed while you are knitting. The remaining beads are pushed away along your yarn/thread until needed later.

knitting with beads

This leads us into these important characteristics of  yarn to select for these types of beading projects —

Characteristics of Yarn/Thread for Projects with Strung Beads

  • Smooth / Non-textured
    A smooth, non-textured yarn obviously makes sliding beads along it easier. It’s possible under certain circumstances to use slightly textured yarns, but we’re going to defer that discussion until later.
  • Firmly Twisted / Abrasion-resistant
    You want a strong, firmly twisted and abrasion-resistant yarn/thread that will hold up to the weight of beads, as well as to avoid fraying the yarn with the friction of the beads on the yarn during the knitting and wearing.
  • No Knots or Weak Places
    This goes along with the first two points, but bears repeating. Even if your yarn of choice qualifies on the two points above, it can avoid down-stream problems to check along the length needed for your project’s beaded section that there are no knots or weak places that can disrupt the flow of beads sliding smoothly along the yarn.

Of course, there are also other choices to be made when combining beads and yarn, such as

  • yarn/bead color combos, and
  • compatible yarn weight/bead sizes.

I promise I will be getting to these in future episodes. In the spirit of “Bits”, I don’t want to blab on too long here. (With my love for knitting with beads, believe me, I could go on and on — it is all I can do to hold back for now, lol).

Stay tuned for more in this month’s tutorials, tips & techniques for the Beading Hearts Friendship Bracelet pattern.

Posted in Bit-size Tutorials | Tagged , | 1 Comment

Stringing Beads Without Special Equipment

You don’t need fancy beading needles or gadgets to string beads. Anything that will get a strand of your yarn through the hole in your beads can be considered.

In fact, you can use something you probably already have on hand string to strings beads for the first project of BOBBOL 2013: Beading Hearts Friendship Bracelet. Here are some of my favorite simple, low-tech options:

Some simple beading needle options

Some simple beading needle options

A tiny tapestry needle
(left in above photo)

If you have a size 24 or 26 tapestry needle, this can work well if:

  1. you can manage to thread the needle with your yarn
  2. the threaded needle will fit through the hole in your bead

Small sewing needle with “sewing thread eye”
(center in above photo)

Sewing needles not only come in thinner sizes than tapestry needles, but the eye on some styles is slimmer so it will easily pass through the hole in your beads. Since you won’t be able to thread your yarn directly through the eye of the sewing needle, make a “sewing thread eye”:

  1. Thread the eye of your needle with a short length of sewing thread.
  2. Holding both ends of the sewing thread together, make a simple overhand knot and pull snugly.
  3. Clip the ends of the knot a short distance from the end. Now you have an “eye” through which you can easily pass your yarn.

Nylon dental floss threader
(right in above photo)

This “needle” option won’t stick you, and the collapsing eye is easily threaded with your yarn. Here is a picture of how the beads slide over the “eye”, collapsing it in the process of the beads being strung onto the yarn.

Stringing beads using a nylon floss threader

Let’s string beads!

If you’ve been hesitant to try stringing beads because of thinking you need special equipment, I hope this helps get you started with what you have on hand.

I’ll be back soon with more about knitting with beads. Happy knitting and beading!

Posted in Bit-size Tutorials | Tagged , , , | 1 Comment

Beaded Garter Stitch: A fun and easy bit-sized start to knitting with beads

Knitting with beads is fascinating and fun. Who can resist adding bling to their knitting? Before you know it, you might find you are addicted to thinking of ways to add beads everywhere!

The basic techniques of knitting with beads is quite easy. In fact, there are MANY different methods of knitting with beads. However, they often produce different design results and thus are not exactly interchangeable. Also, there are pros and cons in each method depending on what and how the project item will be used. I plan to cover these  as we go along in this year’s series of bit-sized projects and tutorials. Please trust me meantime that I am using a method in each of our projects for good reasons. [superemotions file=”icon_wink.gif” title=”Wink”]

But first things first so we get off to an easy, bit-sized start. Our first project, Beading Hearts Friendship Bracelet, uses Beaded Garter Stitch. The premise is simple:

  • string beads onto your yarn
  • knit in garter stitch, pushing a bead into place between stitches to create the pattern design

Stringing beads using what you have on hand

You don’t necessarily need special equipment to string beads. Of course, there are lots of special purpose beading needles and gadgets out there that you might decide you want  after you really succumb to the addiction of knitting with beads. But for this first project, you can use what you probably already have on hand as a “beading needle” rather than going out and buying anything special. I’ll be back tomorrow to show you.

Posted in Bits of Beads | Tagged , , | Leave a comment

Kicking off BOBBOL 2013 with Beads

Happy New Year! I’m excited to have you here to help me kick off BOBBOL 2013.

BOBBOL continues the popular Bits of Lace 2012 Series with the addition of bit-size projects for building skills in beading (the BOB portion stands for Bits of Beads, of course, lol).

If you have been avoiding learning to knit with beads or to knit lace because you think it is too hard, I am going to tempt you with a little project each month that involves just a few stitches. Even if you already know how, I think you will find the projects fun (and who knows, you might even pick up a tip or trick along the way).

Some monthly bit-sized projects in 2013 will be lace and some not. Some will be beads and some not. There will be something for everyone.

Starting off the BOBBOL 2013 series for January’s bit-size project is Beading Hearts Friendship Bracelet. The pattern is available for you to download for free now.

Beading Hearts Friendship Bracelet

Beading Hearts Friendship Bracelet

Throughout the remainder of January, I’ll be popping in at the KnitHeartStrings site with bit-size tutorials and tips to help you over any humps and answer questions.

Remember that Beading Hearts Friendship Bracelet is available for you now under the Free Membership Pattern menu, but only for the remainder of January.

Not a member of KnitHeartStrings yet? Register now – It’s a great deal with free membership.

Happy beading and knitting in 2013!

Posted in Bits of Beads | Tagged , , | Leave a comment

What is BOBBOL?

The BOBBOL Series will be a little pattern project each month of 2013. But I bet you are still asking — What is BOBBOL? Stay tuned and check back soon to find out. (or you can leave your guesses here, lol)

Thank you to all members participating in our 2012 Knitting Bits of Lace Series. During 2012, we knitted lace edgings as little projects and were inspired to create edgings as beautiful addition to garments, linens, and accessories. Because these trims are typically done on just a few stitches, each project took just a small amount of materials and time, while learning (or re-remembering) knitting skills to make knitting even more fun.

The final project of the year – A Bit of Lace Dolly Shawl – was a decided favorite based on server statistics and pattern downloads. But then, who cannot love something for a dolly or teddy. I think it must bring out the child-like memories in all of us (and help us reach to the children around us that we love so much — I know it does for me). What were your other favorite(s) in the Bits of Lace 2012 Series?

So now we are entering a new year. And with the encouragement and support of SO many people who have coaxed me to continue KnitHeartStrings (every bit helps, whether contributions to the costs of keeping the site running, or continuing to spread the word about my HeartStrings patterns which helps in the end to defray costs of the free patterns and services), I am going to keep the site going (at least for a while to the best of my ability).

I’ll be posting again soon with the first project pattern in the BOBBOL Series for 2013.

Happy New Year!

Posted in Q&A | Leave a comment

Q&A: Keeping track of which edging row you are on

Susan asked:

Is there some secret method for remembering the edging? I keep losing track of which row I’m on and it’s pretty challenging to rip this back a few rows (having done it a few times already when I decided it wouldn’t be ok to leave the error there). This doesn’t seem to be a 4 row pattern that sticks in my brain unless you have some suggested tricks for that. I’ve already copied and printed it very large so it’s easy to glance at … Perhaps it’s just a pattern that needs to be focused on instead of being knit while watching TV or making conversation or something. It’s really pretty, of course.

Even though the edging used to bind off the Bits of Lace Dolly Shawl is quite narrow (only 5 – 7 stitches), there is a lot going on in those few stitches. And it is different on each row! So definitely not repetitive and easily memorized. Re-writing the pattern larger on a separate “flip card” for each row and focusing without unnecessary distractions of TV and conversation are good strategies. Here are two others.

Strategy 1: Try to always complete the 4-row repeat before putting your work down.

When I am doing narrow edging patterns, I try to group rows into “work units”. For an edging pattern like this with just 4 rows and relatively few stitches, it makes sense to me to just go ahead and treat all 4 rows as a single work unit. After all, the 4 rows are not more than the equivalent of a fairly short row of only 25 stitches.

Therefore, I try my best to never stop in the middle of a work unit and put my work down. If someone wants to interrupt you, say something like “after I finish this row”, but in truth what you mean is “after this work unit”, lol.

However, we all know that distractions or emergencies do happen. And there inevitably will come a time when you have to put down your lace edge knitting without noting which row you have just completed. Parts a and b of Strategy 2 will help you identify the correct row to be worked next.

Strategy 2 – Part 1: Note the direction of odd-numbered vs. even-numbered rows

The first step in identifying the correct row to be worked next, is to determine whether you had just completed an odd-numbered or even-numbered row.

For the lace edging on this dolly shawl, the even-numbered rows of the Edging pattern are worked toward the body of the shawl; the last stitch of each of these rows also binds off 1 stitch of the body with an ssk.

The odd-numbered rows of the Edging pattern are worked away from the body of the shawl.

If your working yarn is next to the body stitches, then you had last worked an even number row (i.e. either row 2 or 4). Vice versa, if your working yarn is at the outside edge of the lace edging away from the body of the shawl, then you had last worked an odd number row (i.e. either row 1 or 3).

Which was the last row worked?

Which was the last row worked?

For example, in the picture above, the working yarn is at the end of the needle toward the body stitches, and therefore an even-numbered row was last worked. But which even-numbered row?

Strategy 2 – Part b: Use an identifying characteristic (e.g. stitch count) to determine which odd-numbered or even-numbered row was last worked

Now that you know whether you just completed an odd or even number row, you can concentrate on just that subset of rows to determine which was the last worked.

Fortunately, the different stitch counts on rows of this lace edging that I used as your skill practice for the dolly shawl can be used to advantage in identifying which row you last worked.

The mystery is easily solved by counting the number of stitches in the above picture. Which even-number row resulted in 5 stitches?

It’s not a trick question. If you said row 4, you are correct. Therefore, the correct row to work next is row 1.

If you were working a pattern where the stitch counts were the same on odd or even rows, then you would need to use some other characteristic (e.g. the position of a yarn over that occurs on one of the rows and not on another).

Questions? Comments? Other strategies you like to use to keep track of which row you are on?

Posted in Q&A | Tagged | Leave a comment